Wednesday, February 22, 2017

New Life for Old TV Armoires

When we finally replaced our old behemoth televisions a few years ago,
I had three large armoires sitting in the garage, taking up valuable space.
I had to either get rid of them or find a new use for them.

The first was the biggest, a pretty pine armoire from the 1990s.

I had painted it white in its next life,

but at this point, I knew it was on its way out.

I found a spot for it in my garage craft area

and filled it with fabric.

First armoire, useful.

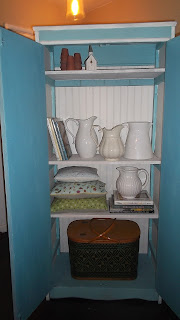
The second one we bought at an antique store when we
were first married in the early 1980s. It had a second life
as a Nintendo cupboard for the boys in the '90s, then used
as a paint cupboard when I decided to do something with it.

I painted it a pretty shade of blue and white,
thinking I would sell it.

We added bead board to the back and some pretty things.
Now I wanted to keep it.

So now it's filled with toys.

Second armoire, useful!


The last one was my least favorite, but now it's most favorite,
because it is the most changed.
Unfortunately, I don't have before picture,
but the doors were solid and it was black when it lived in my bedroom.

I had Husband cut out the insides of the top doors
and I added chicken wire and red paint.

I put a piece of green tin over the hole in the back
that was cut out for the tv,

and added some odds and ends.

Now it lives on the back porch with my new swing.

Third armoire, also useful!


Wednesday, February 8, 2017

From Log Bunk Bed to Rustic Garden Benches


This rustic garden bench began life as a bunkbed for my boys,
way back in the 1990s.


Most recently, it lived in my grandkids' room.
Until last summer when we built a Triple Bunk Bed
to accommodate the seven (and counting) grands.

I tried to sell it, even give it away, but it was pretty big
and heavy, so no takers.
So, I did what I usually do with headboards that I
don't want any more, I made a bench.
Two benches, in fact.


There were 2 taller headboards and 2 smaller ones,
perfect for 2 benches.


First thing we did was cut the smaller ones in half.


They would be just right for the sides of the benches.


Which was the next step, attaching them to the back.


To do this, we routed a hole to fit in a long carriage bolt.


Next, we needed a seat.
We wanted to use some pine 1x1s that we already had,
but this proved to be a little tricky, because they had to stay
in exactly the position we laid them out, resting on the sides
in between the logs.

So once we had them in position, we screwed on some
1x3s while someone held them in place.
Then we flipped it over and screwed it in place.

It worked perfectly!

Side view: you can see the edges of the seat
sitting on the edge of the side log.

They aren't staying in my garden, however.
I thought it only fair to offer them to my boys,
since it was their bed after all.