Tuesday, April 3, 2012

Family Recipes: Cinnamon Roll Lamb

I have been making this cinnamon roll lamb for Easter brunch for over 20 years. This year, I also made it for my 5th grade Sunday School.


Ingredients:   (any cinnamon roll recipe can be substituted)

         frozen white bread dough, thawed
         1/4 cup melted butter
         1/4 cup cinnamon sugar
Let the dough rise for an hour or so, then roll it out on a floured board ( save some dough for the head, legs and tail). Spread the melted butter over the dough, then sprinkle the cinnamon sugar over the top.

Roll it up the long way, cover and let rise some more, about 2 hours.

Using a serrated knife, cut into slices about an inch thick.

 Now you are ready to design your lamb.
Using a large baking sheet, cover it with foil (this will make it easy to remove).  Lay out the lamb like the picture below.
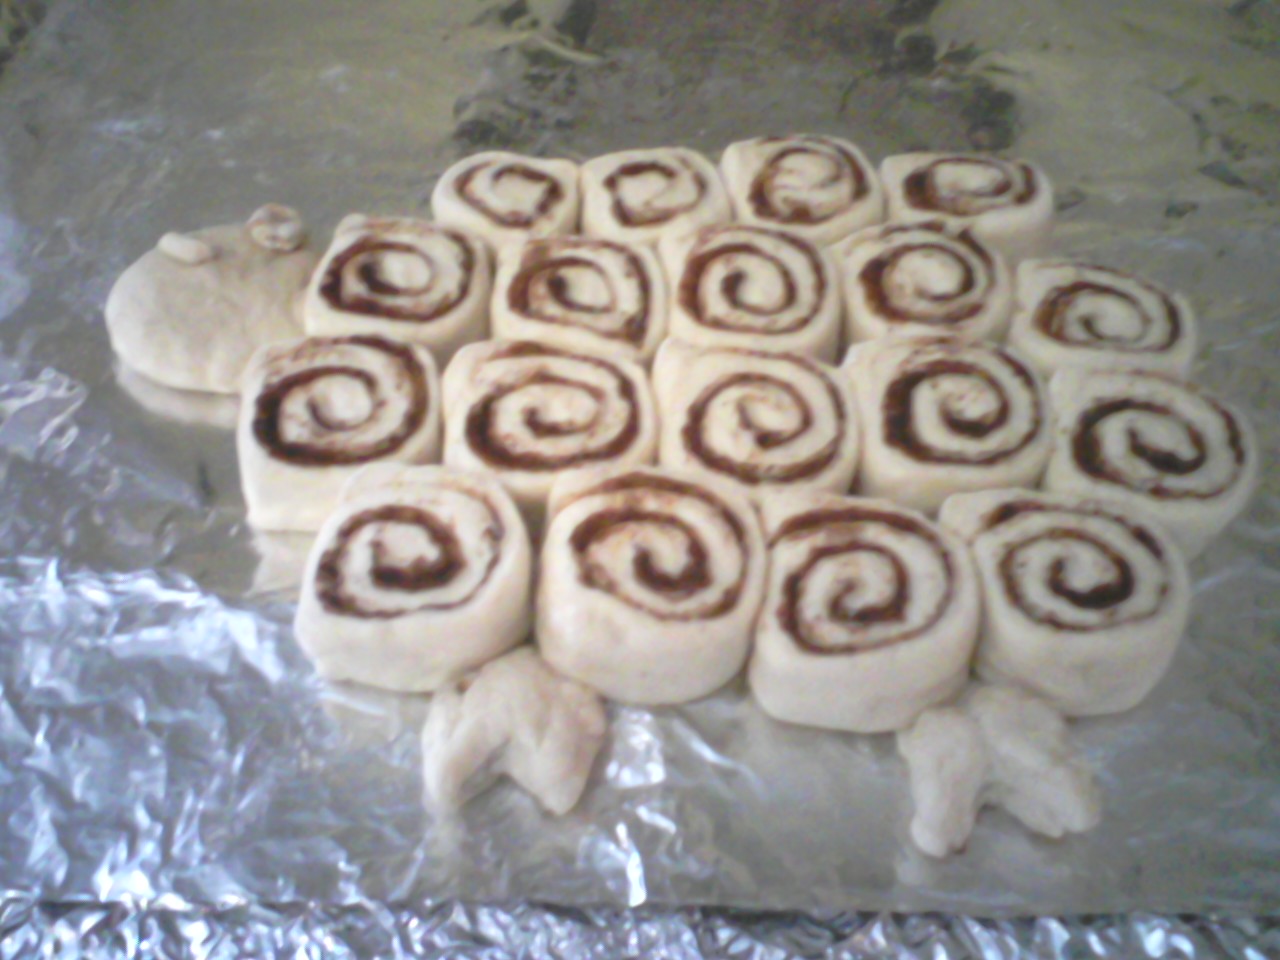
Top row: 4 rolls    2nd & 3rd rows: 5 rolls     last row: 4 rolls

Using the saved dough, shape the head and put it in place. Shape a little tail, ears and eye and put into place.

Shape the legs and cut out a little triangle to form the hooves.

Cover and let rise about another hour or two.
 
Brush on an egg or milk wash, bake at 350 for about 1/2 hour.
Cool, then brush on the glaze.


Glaze:  Mix 1/2 cup powdered sugar, 1 tsp milk, 1/2 tsp vanilla. 


Saturday, March 31, 2012

Decorating Seasons: Spring

The seasons seem to be a little confused around here this year. We had beautiful weather until the first day of spring, then it has been one storm after another. It made it a little hard to get into spring decorating, until I realized just how close we were to Easter. Then I decided I better get moving!

This year's mantle

These cute little clay pots came from a Country Living Fair in Ohio a few years ago and the backdrop is a piece of ceiling tin from an old building.
I made the Rejoice banner this year
 I love these blue plates. They came from England and were a gift from my stepmother many years ago.
There are usually candles in these hurricanes but I like to put English primroses inside them for spring.


 Entry table
The grandkids call the little tray with the miniature rabbits and vegetables, "the neighbors".


Dining table
Eggs nestled in the napkins are the place cards.
Closeup of the centerpiece.
Love this bunny platter I got at a yardsale a few years ago.
 

Miscellaneous spring touches


Thursday, March 29, 2012

Family Recipes: Chicken Enchilada Casserole


This is a shortcut I made up several years ago when I didn't want to fill and roll the tortillas 1 at a time.

I make a white cheese sauce that I use in lots of recipes: Melt an 8 ounce block of cream cheese with 1 1/2 cups milk, stirring until melted so it doesn't burn (I use nonfat milk and low fat cream cheese, but use whatever type you like). Remove from the stove.


To this mixture, add some garlic salt, Italian spices (oregano, thyme, rosemary, etc) and nutmeg. (I rarely measure things, especially spices; if you are not used to this kind of cooking, start with a small amount, taste, add more if you want it) Pour a small amount of the mixture into a baking dish, enough to cover the bottom.

Using scissors, I then cut up several corn tortillas, about 8-10, into bite-size pieces. The pieces can be square, triangular, any shape you want.


Cover the sauce in the bottom of the baking dish with the tortilla pieces.


Next, layer bite-sized cooked chicken, either cubed or shredded, some grated cheese and whatever else you might like. I usually add chopped onion, bell pepper, sometimes jalapenos and cilantro. Again, I don't measure this type of thing, so use any amount you want; I found that I tend to go by looks--in other words, the colors of the different ingredients should have a balanced, pleasing look, and that seems to give me the right amount.


You can make as many layers as you want, but to keep it simple, I usually just put everything in and cover with a layer of tortillas pieces.


Pour the cheese sauce over the final layer and top with grated cheese. Bake at 350 for about 30 minutes.


Serve with guacamole or sliced avocado.

Monday, March 26, 2012

Craft Room Part 3...The Finale

When my youngest son got married and my daughter moved into an apartment, I finally got a craft room again (see earlier posts, My New Craft Room: An Empty Nest Has its Upside and My New Craft Room...Continued). 


Once I had the living space of the room done, I was ready to tackle the work spaces.  I decided to set up my sewing machine and fabric in the closet, so, after Husband took off the doors, I took out the pole and dragged in an old computer desk that my son left behind. This desk was totally falling apart and had been sitting outside, waiting for a trip to the dump for months. My daughter and I had dragged it outside when Luke moved. It was  a cheap, rickety old thing, but I started wondering if I could salvage anything from it; maybe I could reuse the shelves, and the desktop was a good size for my sewing machine... then I wondered why I had to take it apart. So I dragged it inside by myself (I managed to get a large towel underneath it and dragged the towel, worked like a charm),  put a coat of white paint on it and wedged it into the closet.

 It was perfect for my sewing machine and boxes of thread, ribbons, and other items. No one even recognized it, including Luke, who had spent many hours sitting at it (supposedly doing homework, but in reality, listening to music).

Can you see the old desk on the left?
 
These are the shelves that held all of Luke's CDs and now hold thread, piping and ribbon.


Husband added more shelves on the other side of the desk and that gave it more stability.


Plus, they hold my fabric, at least some of it.

Across the room, I installed my daughter's table that she left behind. It has become my workspace.


 I needed more storage here, so I found an old board in the shed and cut it in half (it was already white, so I didn't even need to paint it). I went on a search for something I might already have to become the shelf supports. I found some coffee cans Husband was using/saving for screws and such. I found six in the garage and two more in the pantry (I couldn't wait for him to finish the coffee in these cans, so I emptied them into plastic containers).

I covered the cans with leftover pieces of burlap.
These shelves hold papers, tags, glue and other small items that I use a lot.

Paper storage from office supplies


A beautiful painted iron fence piece is a good spot to place inspiration pictures.


 This old cupboard once held towels in the bathroom, now it holds craft supplies.


So I managed to complete another room using my criteria of not buying anything except paint and, in this case, I didn't even have to do that! 


Friday, March 23, 2012

Slipcovers are the Answer to Just About Everything


 For 25 years, we have mostly bought thrift store or clearance furniture which I would paint and slipcover. My husband was sometimes not a fan; they weren't always the most comfortable or stable pieces of furniture. So, when we received a tax refund a few years ago, we decided we would buy a new couch; a brand-spanking new one, never before owned by anyone else!
We set out to visit the furniture stores. I thought it would be easy to find something amongst all the shiny, beautiful sets. A year and half later, we settled on a big, dark leather couch. Problem was, I didn't care that much for it, but I was tired of looking and I thought my husband really liked it; he didn't care for it that much, but he was tired of looking and thought I really liked it. We didn't realize this until it was too late.


You know, those furniture stores are huge, and the couch looked much smaller than it did when it got to our normal sized living room. It was also so dark, it sucked the light right out of the room. What had I been thinking?


I tried many different ways to make it more to my liking.

Quilts

  Pillows

 Really big pillows


Finally I knew I had to slipcover it. I knew this all along, but I was trying anything I could think of to avoid it, thus the variety of quilts and pillows. It's really big and an awkward shape for a slipcover, but I could put it off no longer.

So here it is


I used $6 a yard natural cotton duck fabric from Walmart. It took about 8 yards plus a couple yards of muslin that I already had. And it wasn't all that difficult once I got started.


It totally changed the look of the whole room, making it much lighter and brighter.

I'll talk about the pillows another day.

 
I think I might even love this couch now!