Showing posts with label piping. Show all posts

Thursday, May 21, 2015

Ticking-Stripe Slip Covers

I love new slipcovers!
And these were long overdue.
The old slipcovers on these chairs were getting a bit ratty,
but I just couldn't find any fabric I wanted to replace them.

Until I decided to change the color scheme of the room.
Then everything fell into place and I suddenly knew
 what fabric these chairs needed to be.
 
 I have done several tutorials on how to make slipcovers, so I won't do that now.
If you are interested, you can check out this sofa slipcover, or either wing back chair
slipcover, here or here.
I will just add a few details and tips relevant to these chairs.

 I wanted pleats (which are very easy and not too time consuming),
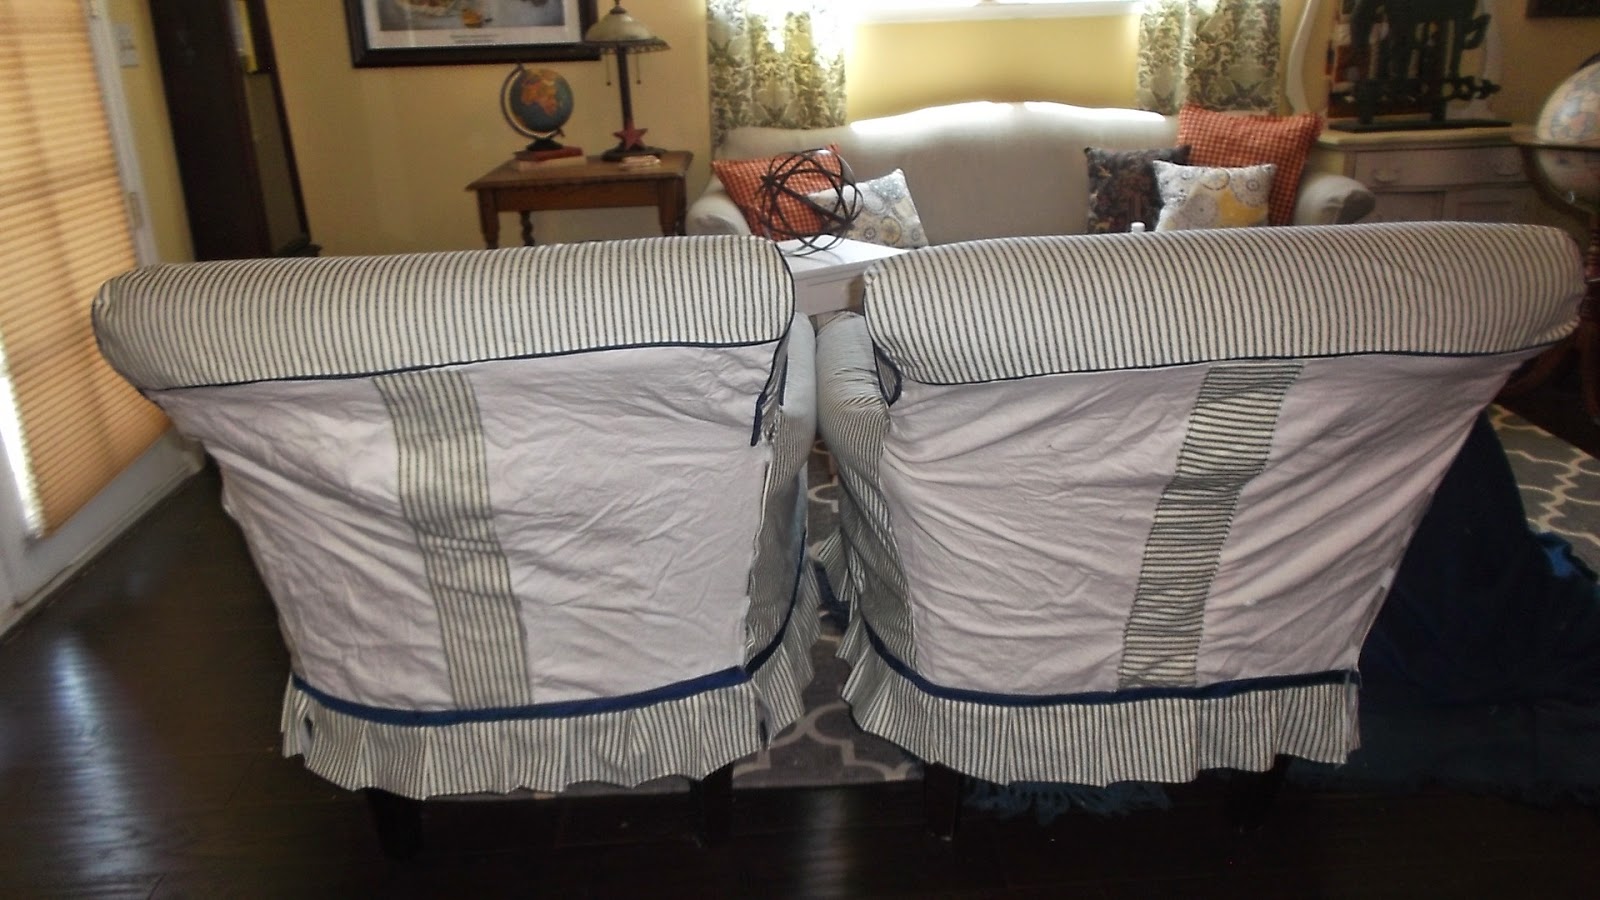
so I used wide navy seam binding as a detail to cover the seam.

 I used the same binding to make matching piping.

I used fabric that I bought a few years ago, and as I was cutting out the pieces,
I realized I was going to be short a couple of yards. I looked everywhere, but
nothing matched the coloring of this particular ticking fabric. So I used
some linen I already had for the backing.

I brought the ticking over the back and added a strip down the middle
to add detail to the plain linen fabric.

I also used muslin for the underside of the cushion
and part of the cushion band that wouldn't show.
This stretched my ticking fabric so that it was just enough!


 New pillows complete the look!


No Minimalist Here


Tuesday, January 27, 2015

Camel Back Sofa Slipcover, Part 2

We are taking this charming old camel-back sofa from this:


to this:


So without further ado, let's get back to the tutorial!

Here is where we left off, the front of the arms pinned,
right sides together and trimmed.
At this point, pin in the piping.

Now sewn and turned right side out, 
but not yet sewn to the side of the sofa.

With both arms done, getting ready to attach the
grey linen to the top and sides.

I find it easier and a better fit to turn down the main fabric and pin/sew
to the secondary fabric, rather than the traditional right sides together plan.

 Piece in whatever you need and pin carefully.

I used the same grey linen on the sides and back of the sofa.
 Just pin a large piece of fabric to the space, cut out the shape
allowing for seams, and pin to herringbone fabric,
using the same method.

 This is the back, just a large piece of linen sewn right sides together.
(Actually, you can sew it either way you choose)

 
 You can see how the arms fall into place once the sides are put together.

Now that the basic sofa is done, it's time to tackle the cushions.


The tricky part here is to pin them around the cushion.
This is important because otherwise they will surely twist and
have to be redone.
 Just be careful getting them off the cushion with all the pins!
If you are using piping, be sure to pin it in too.

These cushions had seen better days and were a little skimpy,
so I added a layer of foam and batting to plump them up.


You have to squish the cushion down when getting the cover on and off.


Finished cushion: nice and plump!


The finishing touch was a band of the linen around the bottom.

 What a huge difference!


It works really well with everything else in the room.


I love the crisp white piping against the soft grey of the herringbone.


The lesson here is, never turn down a free sofa!


Furniture Feature Fridays

Tuesday, September 24, 2013

Another Wing Chair Slipcover


I had another wing back chair to slipcover, so, after referring to my tutorial on the first one I did,
  I took out another drop cloth and got to work.
I did a couple of things differently, but the basics were the same.
 
It started out a lovely blue corduroy in great shape.

I had some pretty blue seam binding and I thought it would be nice for the piping, but I couldn't find it (the piping) anywhere. So, I decided to make my own. It's very simple. 

Just put some string between the binding, or strips of whatever fabric you want to use, and sew it just like the pre-made stuff.

I also decided to put ruffles on the bottom. It's a very easy process, pretty much the same as with an ottoman I made earlier: just pinch, press and sew!

The other difference is where I put the buttons on this chair. I love them on the side of the back piece instead of down the middle, and it's a little less cutting and sewing, too!

This chair is bound for Roses and Rust,

but it's so cute, I am having second thoughts!


Furniture Feature Fridays

Thursday, November 1, 2012

Burlap and Wool: Pillows for Fall

Everyone is in love with burlap these days! 
Including me!

I wanted to use it for some fall accessories, like table runners and pillows, but I also wanted to do something a little different. So I found some pretty wool fabric, as well as ribbon, piping and dropcloth, to add to the burlap, creating a layered effect.

A wool background with dropcloth and orange piping
By using a bright color like orange, it makes everything pop!

Burlap with dropcloth and, again, orange piping

Burlap, wool, dropcloth and more orange piping. 

Wool with ribbon and a button; grey floral, wool, dropcloth and orange trim

Wool, dropcloth, orange piping

Wool and old, mismatched buttons

Use a black marker to write some Thanksgiving phrases; 
make them personal for you and your family.


Tuesday, September 25, 2012

Seasonal Decorating: Table Runners for Fall

The first day of fall is a good time to change out all the summer details and make room for fall. Around these parts, however, it is still just a little too hot for me to be putting out things like wool fabric and quilts.

But fall is almost here and I am so ready!  The temperature has finally dipped below 90 and the mornings are actually quite cool, so I'm going for it!

Table runners are really easy to make. Here are some ideas for fall:
wool with a linen ruffle and brown floral ribbon

burlap with grey floral ruffle and pumpkin piping

burlap with linen ruffle, black and white polka dot ribbon and pumpkin piping

wool with linen ruffle and blue and brown fleur de lis ribbon

Start by measuring the length of your table. If you want the runner to overhang, add 10-12 inches.
For example, my table is 72" long, so I cut my fabric 84". That makes a 6" overhang on each side.
 The width can be anywhere between 12" and 18". Hem the runner on both long sides.

For the ruffles, decide how long you want it to be and cut the width twice as long as the runner's width. Hem the ruffle on 3 sides; on the 4th side, using the longest stitch on your sewing machine, 
 sew a straight line across, leaving long strands of thread on each side and don't backstitch. Then start to pull one thread on each side, a little at a time, until the ruffle is the same width as the runner.
Stitch the ruffle to the runner, right sides together.

To add decorative ribbon, just stitch it over the top, remembering to turn under the ends.

 If you want piping, you have to think ahead and place it between the ruffle and runner when you stitch them together.